


No-Carve Pouring Paint Pumpkin decor
…and other crazy faux pumpkin decor ideas!

As a big advocate for seasonal styling , I feel it’s my duty to you all to go pumpkin crazy this time of year. If you’ve followed my other channels for a while, then you’ll be fully aware of my almost ridiculous pumpkin displays. That’s in no way an apology, it’s just that I do tend to go a bit overboard. Again, I’m not usually a fan of More is More, but somehow Fall and Christmas demand it. The seasons coming up give us so many opportunities for fun and channeling our inner child. One should never completely grow up as far as I’m concerned.
Last Sunday’s pumpkin decor post was all about natural pumpkins, decor and even natural food-grade glue. You can catch it here. Today though, I’m turning it on its head and we’re going all out crazy with faux pumpkins. There is absolutely nothing natural about these, but you can bring them out year after year and it’s a whole lotta fun. Just sayin’.
My No-Carve Pouring Paint Pumpkins
Oh my goodness! I’ve been so excited to show you this! Not only will you have your very own pouring paint pumpkins, but you will also have your very own work of art as part of the process. Don’t say I don’t deliver!
Because I’ve used acrylic pouring paint I have used faux pumpkins this time. It can be any size you like and you can buy them very easily online. These are something you can wheel out year after year to impress the neighbourhood. For illustration purposes, I have used a small white faux pumpkin that fitted nicely on a 20cm by 30cm canvas. Canvas? I hear you cry! Yes indeedy, you are going to become an artist overnight with this gem of a project.
What you’ll need:
One, or more faux white pumpkins. I promise you’ll want to do it more than once!
Ready-mixed acrylic pouring paint of your choice. I used a kit I bought from Hobbycraft. The kit comes with everything you need, including the pouring cup, canvases and spatula. I’m using a colour palette of blues and whites, as is my way. Try to keep to a small palette of 3-5 colours maximum.
A large tray.
Two plastic cups.
A canvas that is wider than the size of your pumpkin. It should sit in the middle of the canvas easily with plenty of room around it for dripping paint!
Rubber/late gloves
Child-like intrigue and joy!


Method
Make sure you have large tray on your workspace that you don’t mind getting covered in paint. You can wash it off afterwards. Place your canvas in the centre of the tray. Then place a plastic cup upside down in the centre of the canvas. Finally, place your faux pumpkin on top of the upturned plastic cup. I know you’re thinking: “what the hell is he doing?” - stay with me!
Then take your second plastic cup and pour a little of your first colour choice from your acrylic pouring paint into the bottom of the cup. Don’t fill it more than 5mm. Next take your second colour choice and add a little onto the top of the first colour. You are trying to stack each colour, one on top of the other. Keep going till you have filled the cup by about two thirds full, alternating your colours.
Now, here’s the fun part:
Gradually pour the contents of your cup over the pumpkin in a circular motion, making sure you don’t cover the pumpkin stalk. The paint will drip onto your canvass below. Keep going till you’ve covered your pumpkin and used up all of the paint. This is your chance to be creative. So, if you think it might be fun to go anti-clockwise all of a sudden (you devil you!), or concentrate on a particular area to get more of one colour there, then do it. This is your artwork, no one else’s!
Finally, lift the pumpkin off of the upturned plastic cup and set aside to dry. Remove the upturned plastic cup and then take your canvas into your hands. Manipulate the canvas to cover it with the paint, creating interesting patterns as you move the board up and down and from side to side. When you like what you see you are done! Set aside to dry for at least a day.
In my kit I also had a bottle of glycerine oil. You can add a few drops to your paint cup as you like. This creates a bubble-like effect on the canvass or pumpkin.
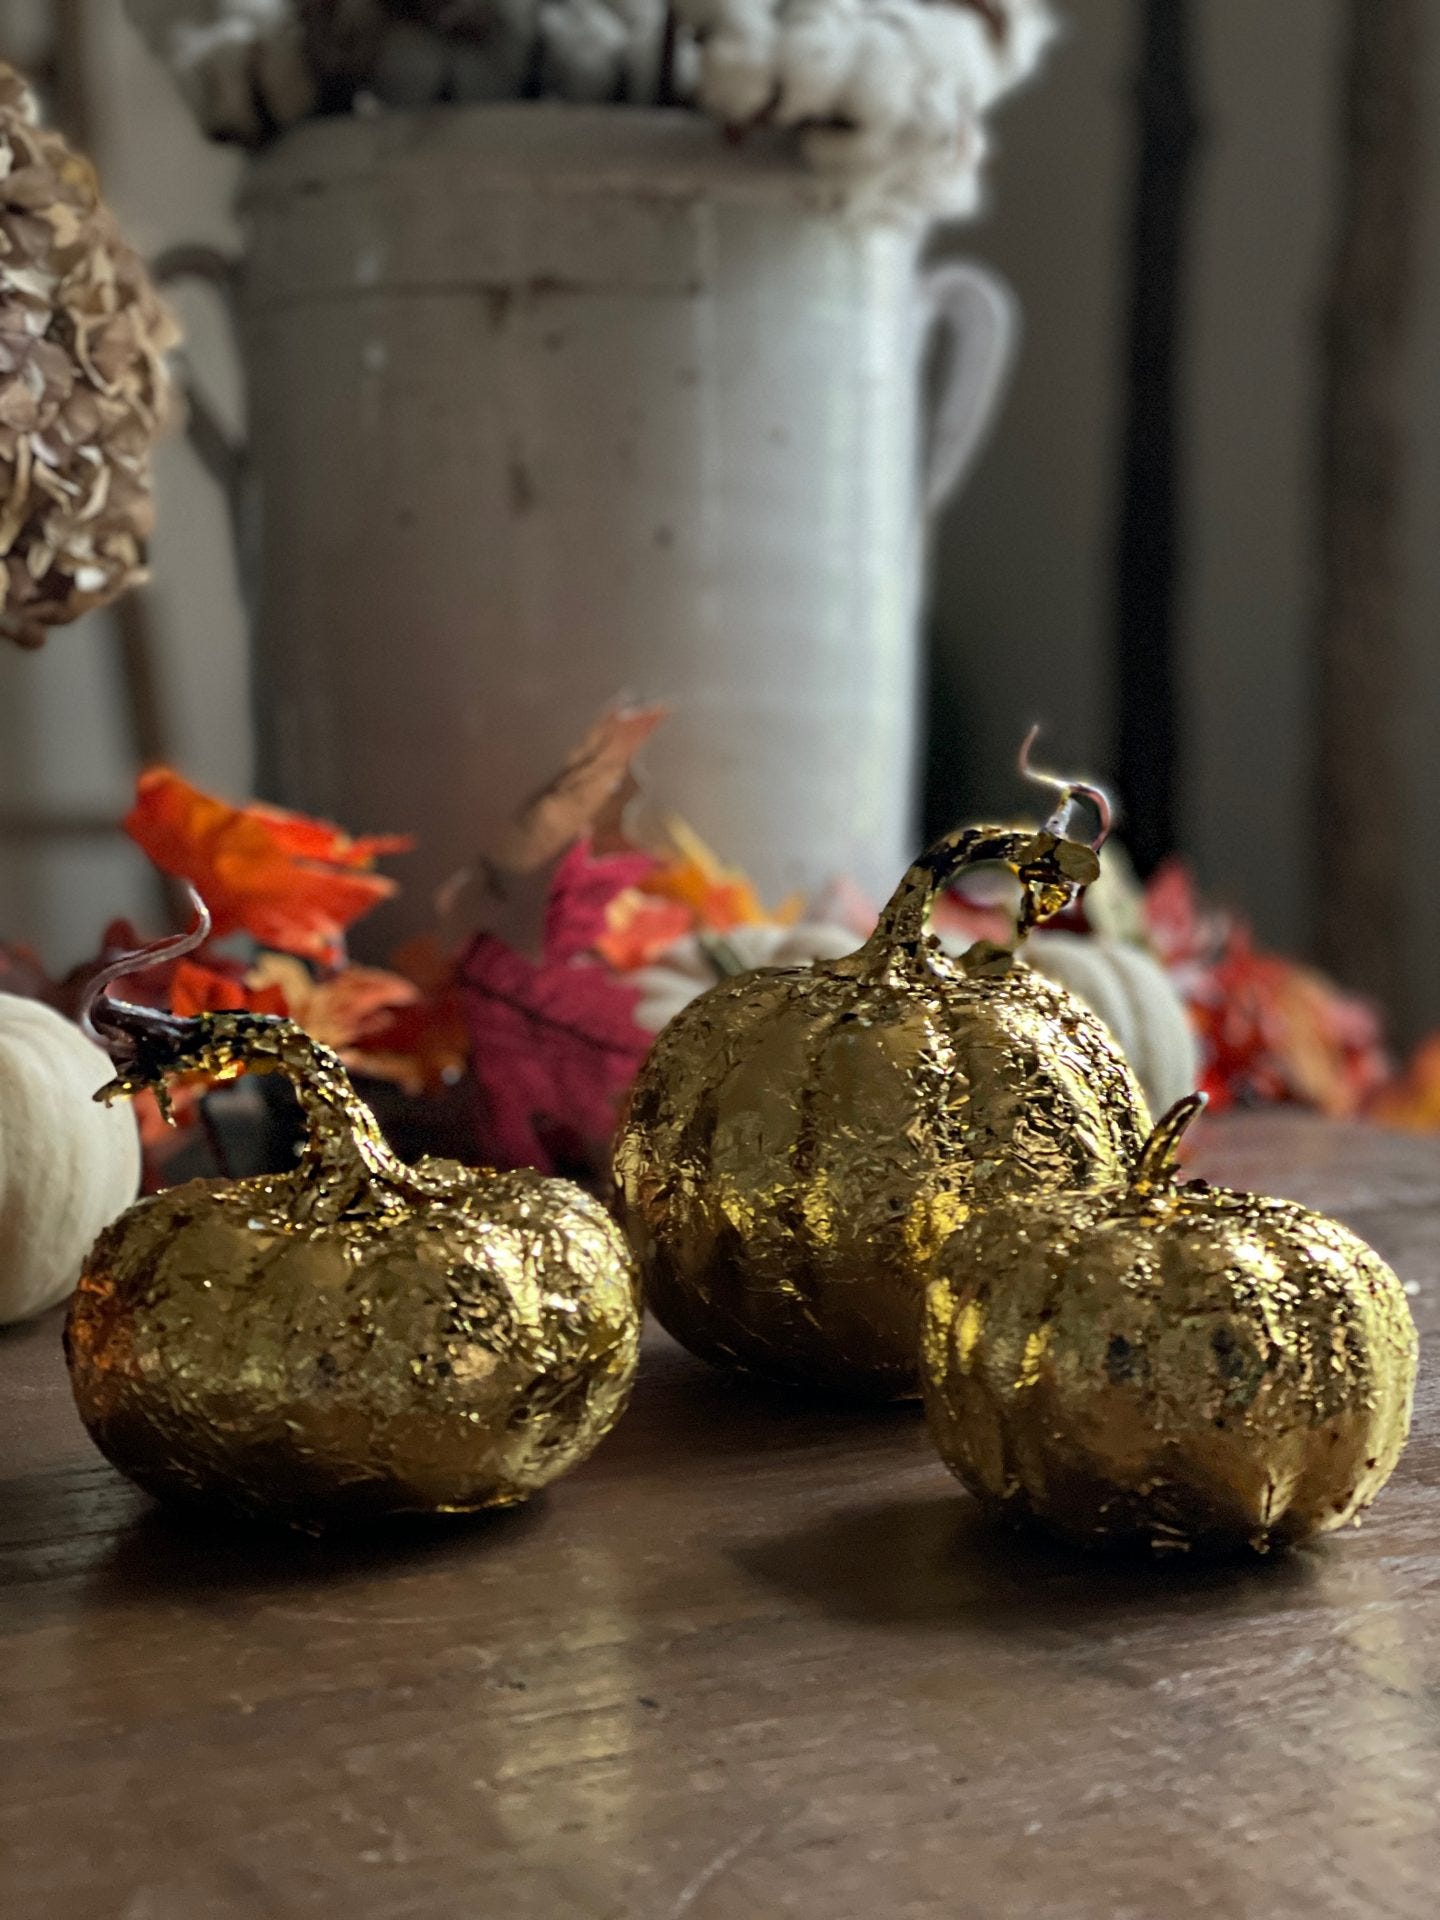
No-Carve Gold Leaf Pumpkins
Again, these are super easy, but I did find them the most annoying to do as I managed to get gold leaf over absolutely everything including my hubby, who wasn’t even in the room! I also got them all over my fingers and annoyed Mr C to death by running around the kitchen chasing after him singing “Goldfinger” in my best Shirley Bassey voice.
What you’ll need:
An assortment of faux mini pumpkins. You can use real ones too if you want.
Gold leaf.
A small paint brush.
A large mat to do it on, or a tray.
Spray adhesive or your home made glue from my last post.
Patience and quite a bit of cleaning up afterwards (I’ll be finding gold leaf debris for years).
Simply spray one pumpkin at a time with the adhesive, or apply your home made glue liberally from my last natural pumpkin post. Then, one by one attach the gold leaf squares. I found it easier to keep one side of the gold leaf within its wrapper and then used the pressure from my hand to press down onto the pumpkin. Just keep going till it’s all covered in gold loveliness. Use the small paint brush to press down edges and brush off any residue. Voila!

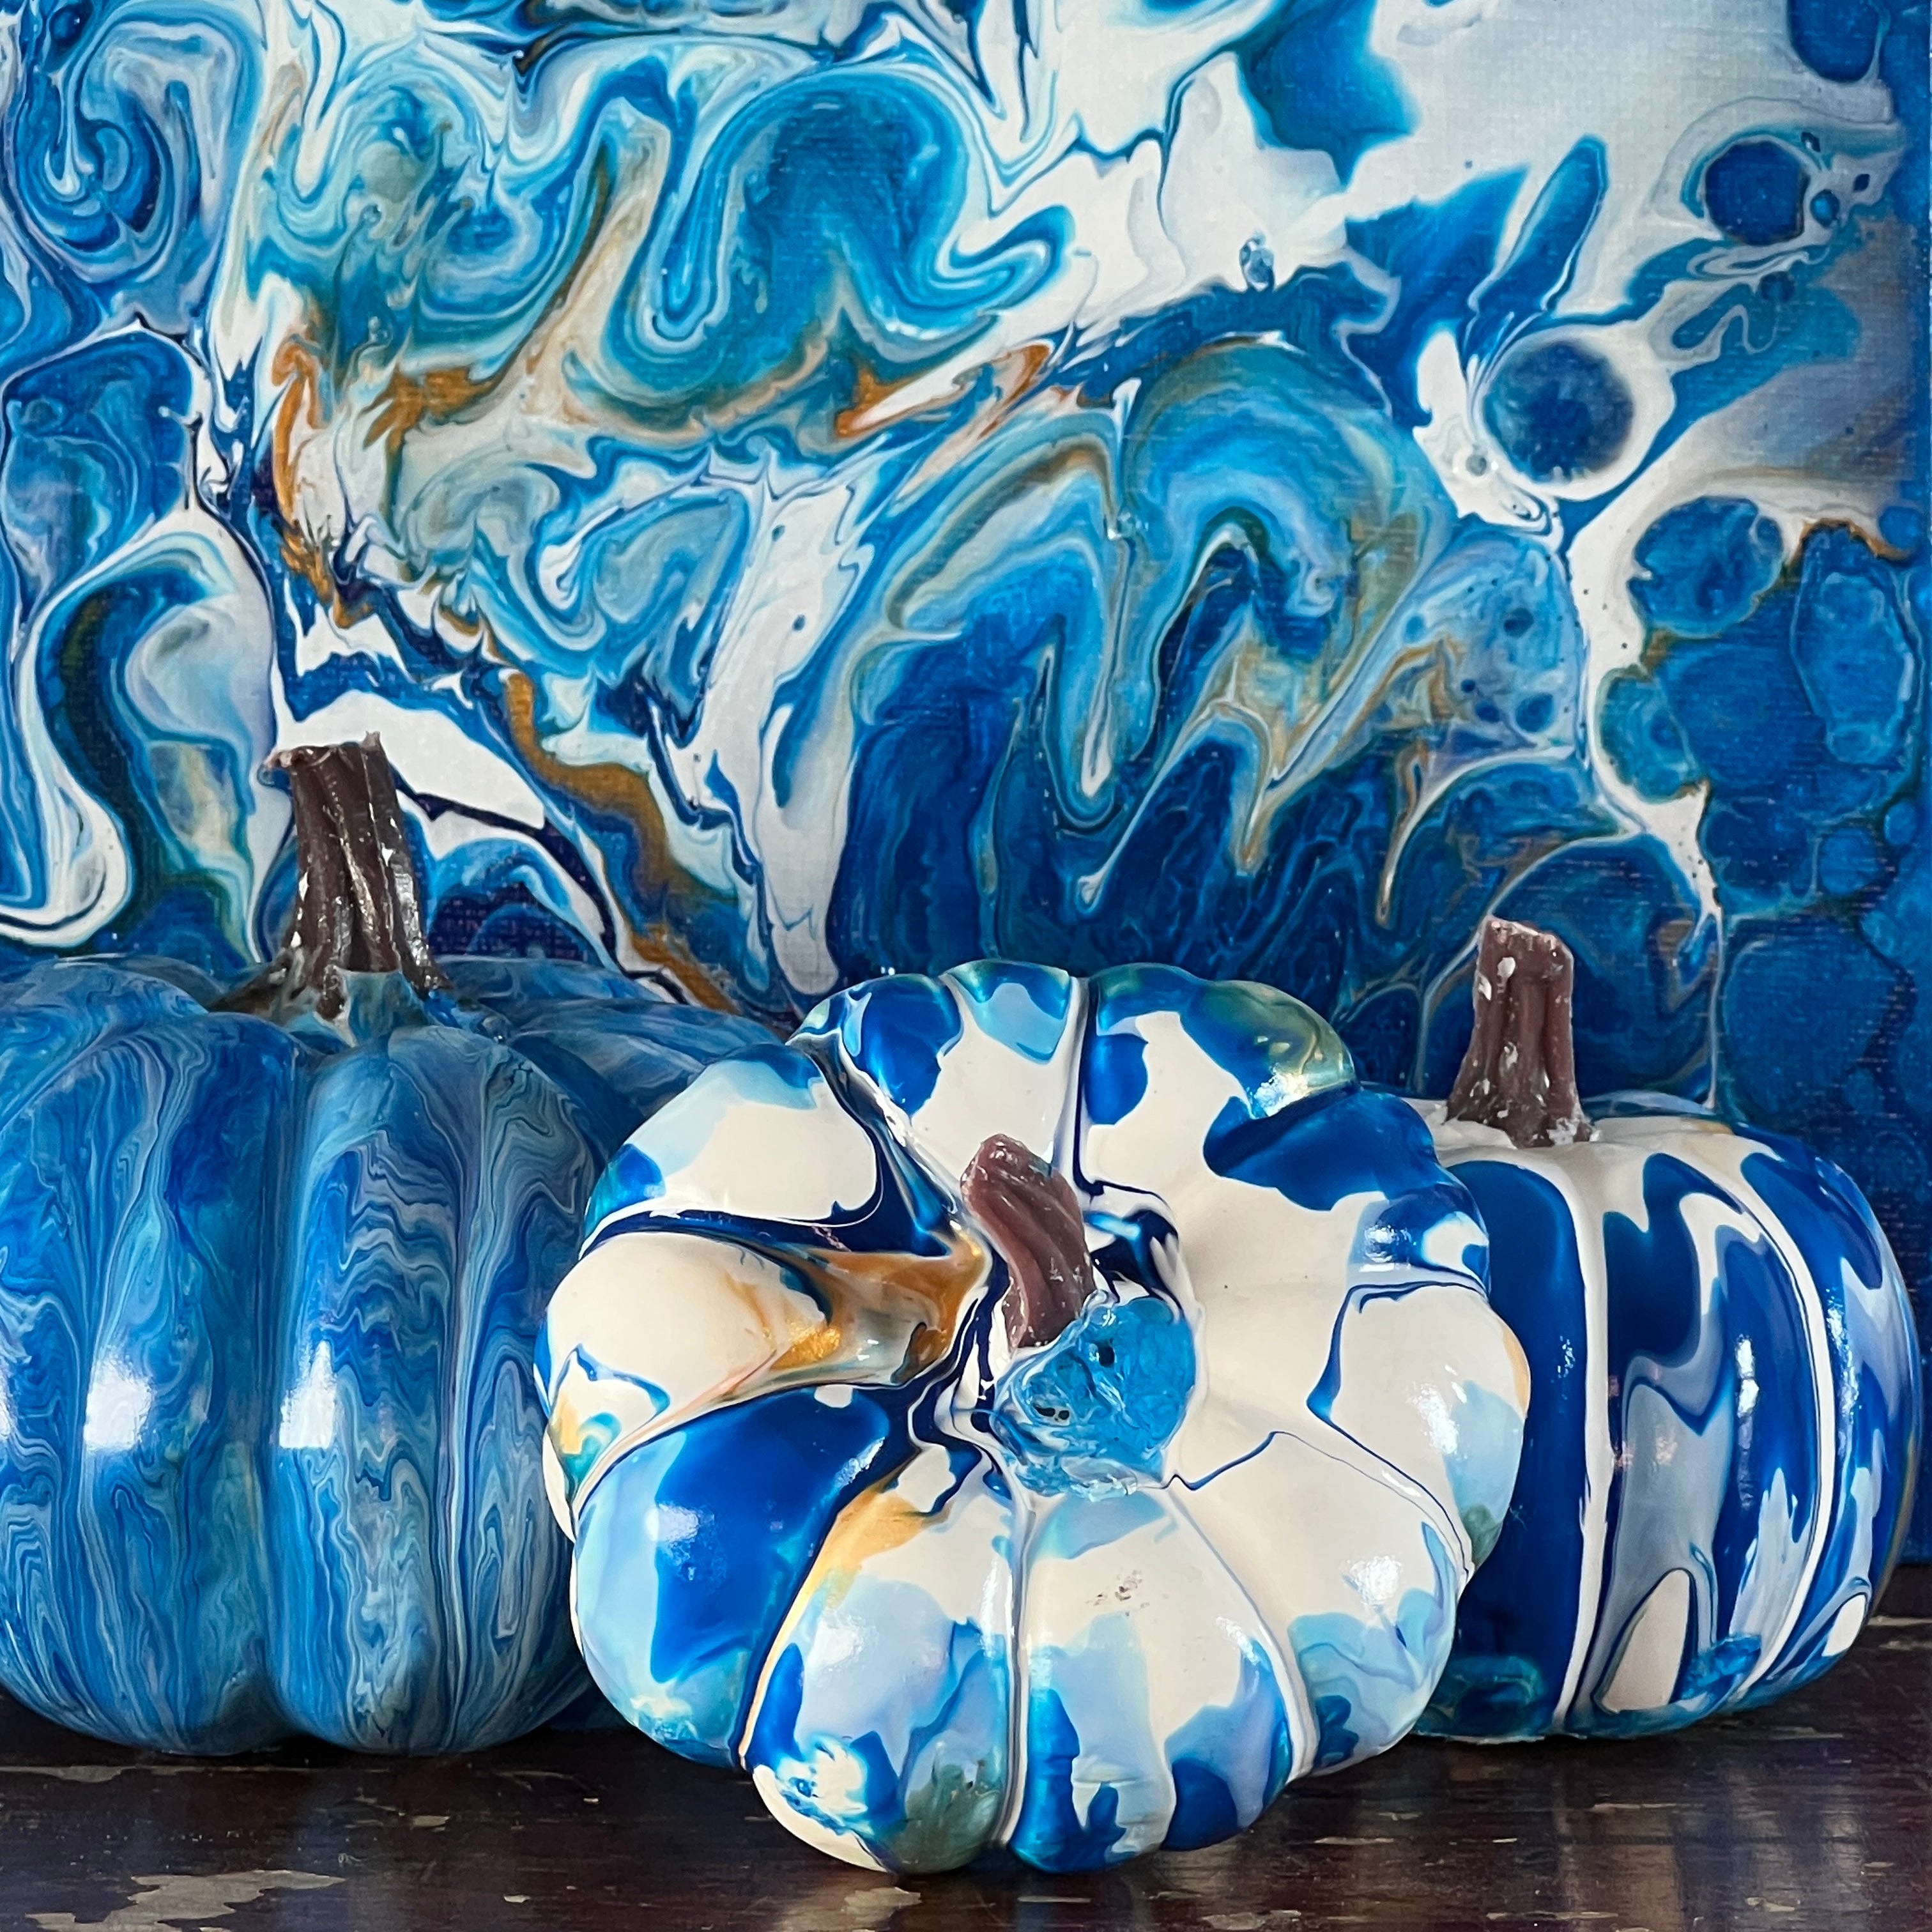
No-Carve Pumpkin Marbling
Pumpkin marbling is so easy! Anyone can do it, I promise! Here’s what you’ll need:
A selection of mini white faux pumpkins. used faux ones from Amazon.
Some Indigo Blue nail varnish, or a colour of your choice.
A plastic bowl that you no longer need (It’s going to get messy and it will be ruined forever!)
Warm Water
Kitchen Towel
Fill the bowl with lukewarm to warm water (not too full). Pour a little nail varnish into the bowl in a swirling motion. Take one of your pumpkins by the stork and immerse in the varnish/water solution and swirl around till covered. Remove it from the bowl and place on a piece of kitchen towel to dry. Repeat with the rest of your pumpkins. Wait for an hour or so for them to dry and then style them up like a pro!


No-Carve Simple Painted Pumpkins
One of the easiest, but most effective ways to decorate pumpkins is just to paint them using whatever you have at home. I used Farrow and Ball tester pots that I had left over to decorate faux mini pumpkins that I bought online. By carefully choosing a colour scheme you can create a really pleasing display. I replaced the plastic stalks with real twigs from the garden. To secure them I used a glue gun.


So that’s it. Hope you try one or two of these. Keep a look out for this Sunday’s post as there is an announcement! Do leave a comment if you can and feel free to share this post with friends and family via email, or in here.

Oh great this is darling ! Love the marbling we used to teach that a lot in art , and some handy tips I read for tackling gold leaf ! 😂..I can just hear the dulcet tones of our Shirley B ringing in hubby’s ears 😂. So much detail here must of taken you ages and such a great reference point for those seasonal fun crafts ! Well done that man ! Totally awesome Xx
Those pumpkins turned out so cool!